Spigen

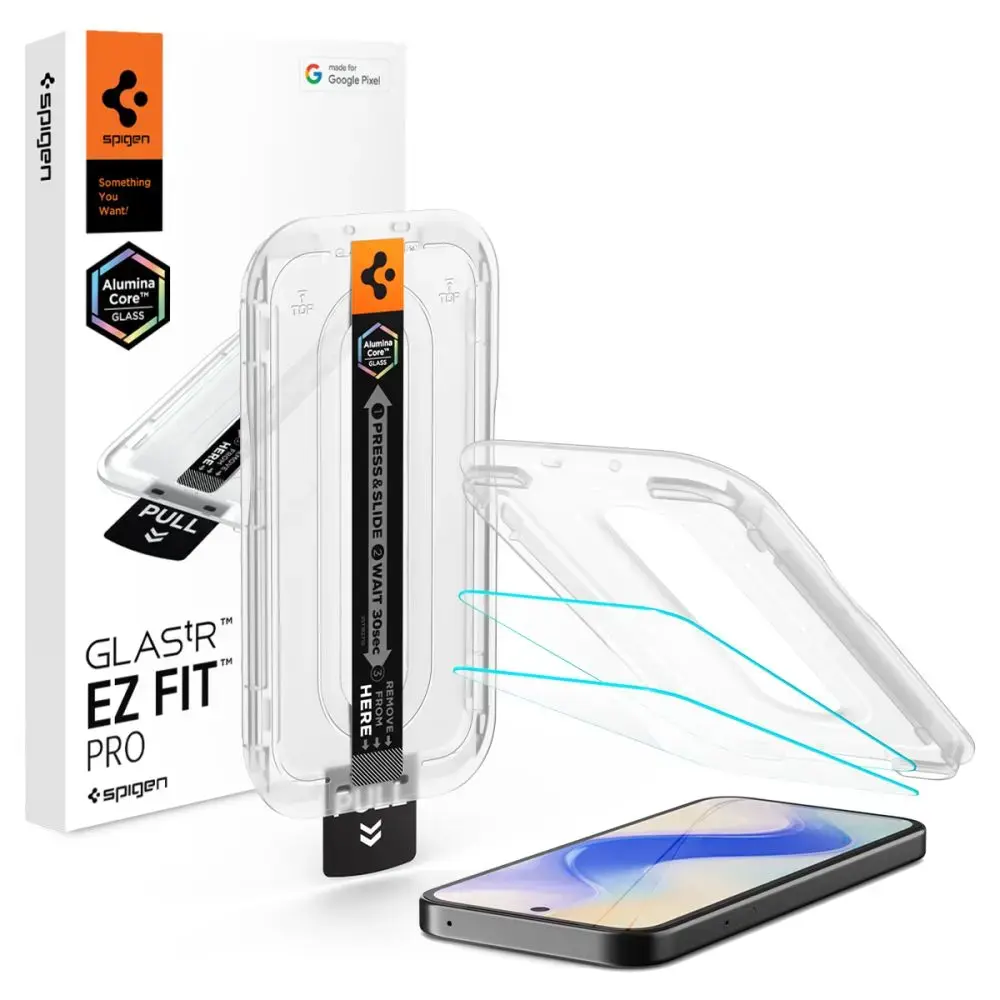
SZKŁO HARTOWANE SPIGEN GLAS.TR "EZ FIT PRO AC" 2-PACK GOOGLE PIXEL 10A CLEAR

SKU: 8800337244977-AGL11364 EAN: 8800337244977
In stock

Wholesale prices — for partners only

Register as a B2B partner to see prices, stock levels and place orders.

Register to see prices

Description

The Spigen Glas.tR EZ Fit Pro tempered glass represents the latest generation of screen protection, featuring cutting-edge AluminaCore technology for maximum durability and superior scratch resistance. Designed specifically for the Google Pixel 10A, this screen protector combines industry-leading 10H+ hardness with a crystal-clear finish, ensuring your display remains pristine and fully responsive to every touch.

Key Features

  • Precision Installation: Includes the innovative EZ Fit Pro mounting frame for a perfect, bubble-free application every time.
  • AluminaCore Technology: Advanced ion-exchange process provides 10H+ hardness, offering superior scratch protection compared to standard tempered glass.
  • Flawless Clarity: Maintains original screen brightness and color accuracy with zero touch latency.
  • Oleophobic Coating: Resists fingerprints and smudges, keeping your screen clean and smooth.
  • Comfortable Design: Precision-milled edges ensure a seamless feel and smooth navigation.
  • 100% Original: Authentic Spigen product in original packaging.

Technical Specifications

  • Model: Glas.tR EZ Fit Pro HD
  • Compatibility: Google Pixel 10A
  • Material: Tempered Glass
  • Hardness: 10H+
  • Dimensions: 149.32 × 68.37 mm
  • Color: Clear
  • Coating: Oleophobic

Kit Contents

  • 1 × Spigen Glas.tR EZ Fit Pro Tempered Glass
  • 1 × EZ Fit Pro Installation Frame

Installation Guide

  • For best results, install in a bathroom after a shower; the steam helps settle airborne dust.
  • Thoroughly clean and degrease your screen, then polish it with a dry cloth until no dust particles remain.
  • Place the mounting frame with the pre-installed glass onto your phone for perfect alignment.
  • Pull the starter tab to initiate the automatic adhesion process.
  • Press down firmly in the indicated areas to ensure the adhesive bonds correctly.
  • Remove the frame and use circular motions to push out any remaining air bubbles.

Note: Due to the curvature of some displays, a slight "halo" effect may appear around the edges after installation. This is a natural occurrence depending on the specific screen design.